Preparation, preparation, preparation!
Sand off the old varnish, depending on the state of it. If it's in reasonable nick just a little. If there is serious damage take it back to the wood with stripper, chemical, or a heat gun if you have the skill to use it!
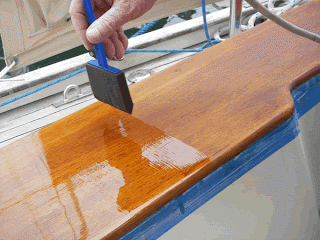
We always use foam brushes, a new one for each coat. Only 5Q each from the local hardware store! For this project TBH has a 3" and 1" brush.
Don't think of brushing at all, let the varnish flow onto the surface! A Zen like trance comes over TBH's face when he is laying the new varnish down...
You can only lay it off once, so don't be tempted to brush back and forth! There will be more coats to come!
Remember the finish is achieved by the sanding between coats, NOT the build up of varnish!
Only one coat, allow to dry for at least 24 hours and then sand it all down. Heartbreaking but oh so necessary to achieve that mirror like gloss that we aspire to..
.So that's where my pudding basin went! You have to watch TBH like a hawk or he's liable to make off with all sorts of unsuitable(in my eyes) bits from the galley...
And there you are..
After just three coats with a sanding between each the cockpit has that wonderful gleaming coaming again, fit for visitors...until the next time which will come around all too quickly!


2 comments:
i was painting basebaords yesterday, i think its more fun to paint at sea~
miss you at food for thought, i hope you will be jumping back in to share your books ahoy!
Thank you, yes I will be back. Just busy in other directions right now. Enjoying reading everyone else's blogs though!
Post a Comment